 If the real con was the friends you made along the way, then what better way to celebrate the con than with friendship bracelets? We here at the UBlog are trying to make friendship bracelets a thing this year (and yes, we’re shamelessly ripping this off of Taylor Swift, but friendship bracelets are for all occasions, okay?), and we would love for you to join us.
But if you’ve never made a friendship bracelet before and aren’t sure where to start, we can help.
Supplies
First off, you’re going to need supplies. You’ll need:
Scissors: Any pair will do
String: You need stretchy, elastic cord for your bracelets. I like Stretch Magic, but any will do.
Glue: This is optional, but you can add glue after you’ve tied off your friendship bracelet for extra hold. B-7000 Craft Glue is a popular choice.
Beads: Here’s where the fun starts! There are lots of different sizes of beads, and there’s no right answer here. Maybe you prefer small beads. Maybe you prefer big beads. You will likely need letter beads, though. To make things simple (and give yourself options), I would suggest purchasing a bead kit. You can visit any local crafting store or shop online.
Here are a few suggestions:
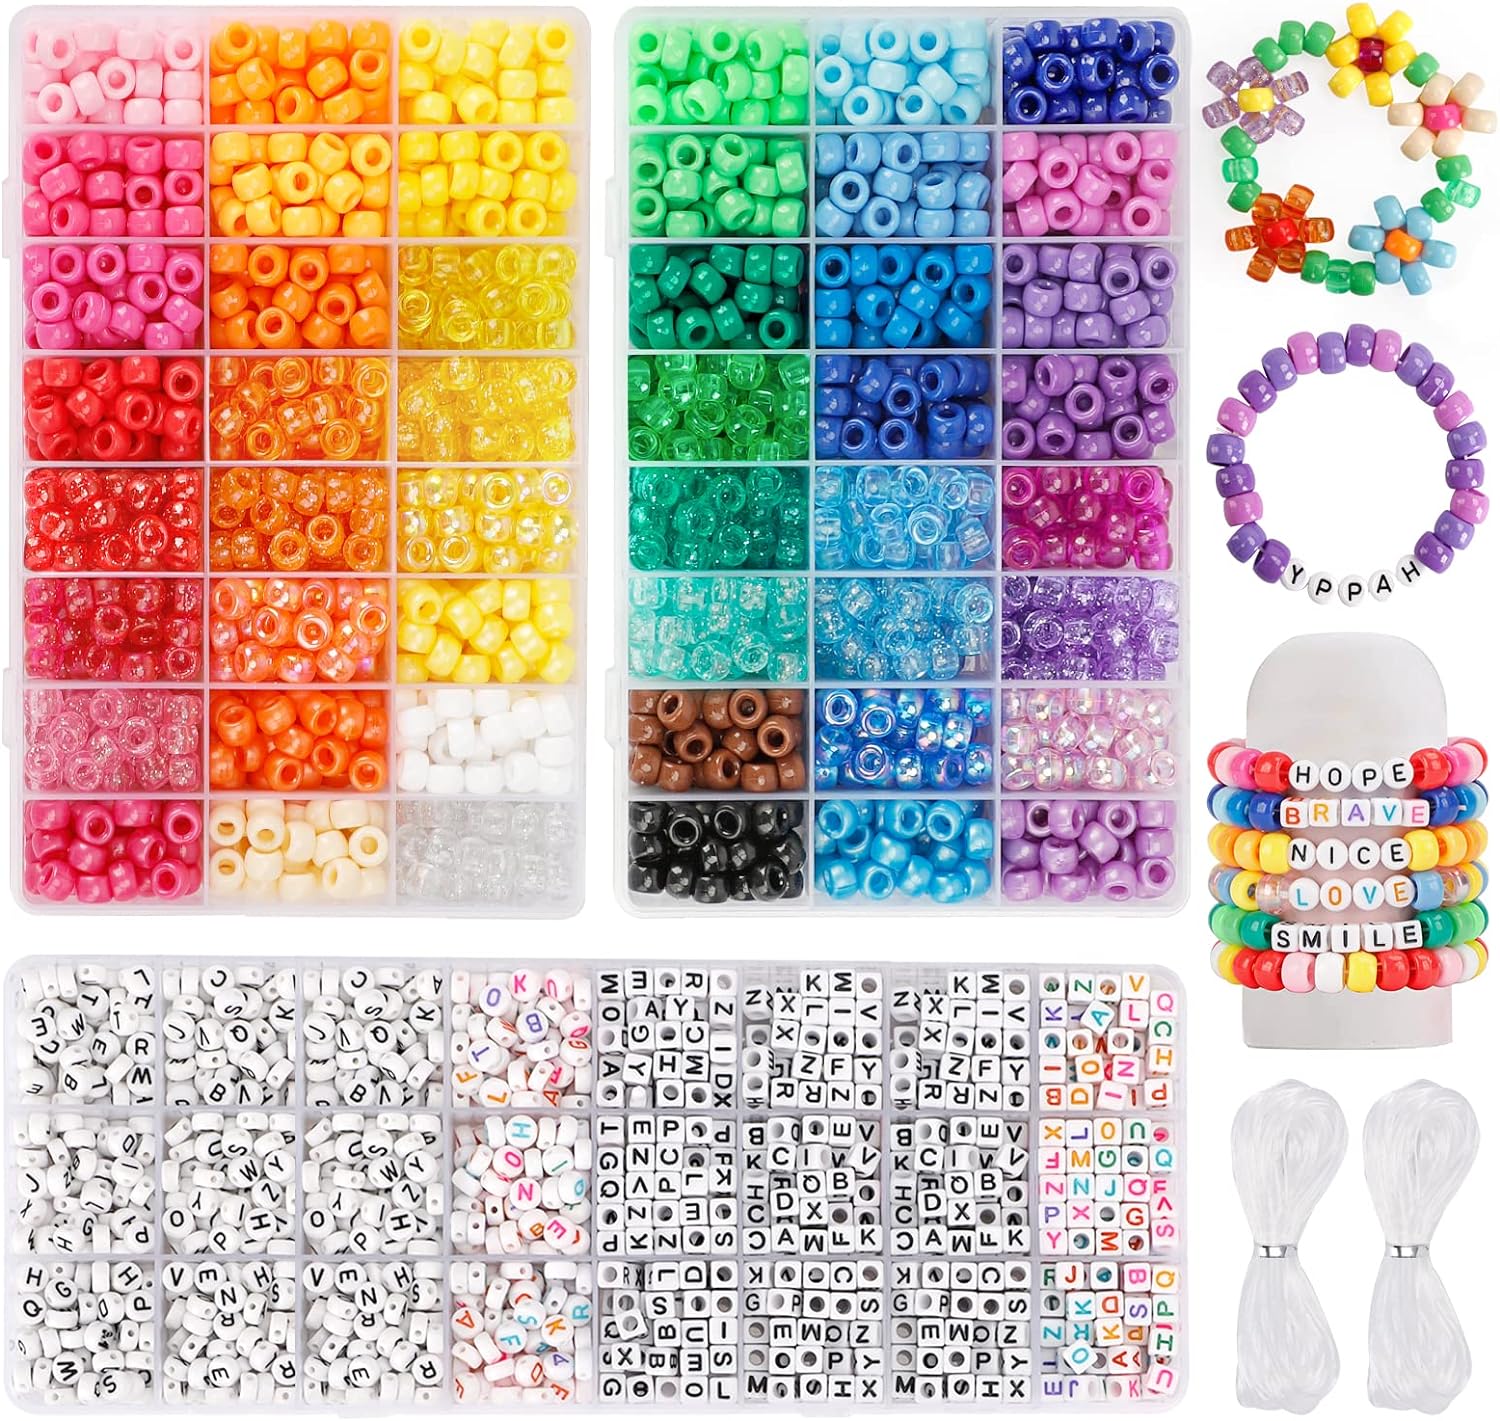
QUEFE 3960 pieces Pony Beads – $21.99
Includes 48 colors. These are larger beads.
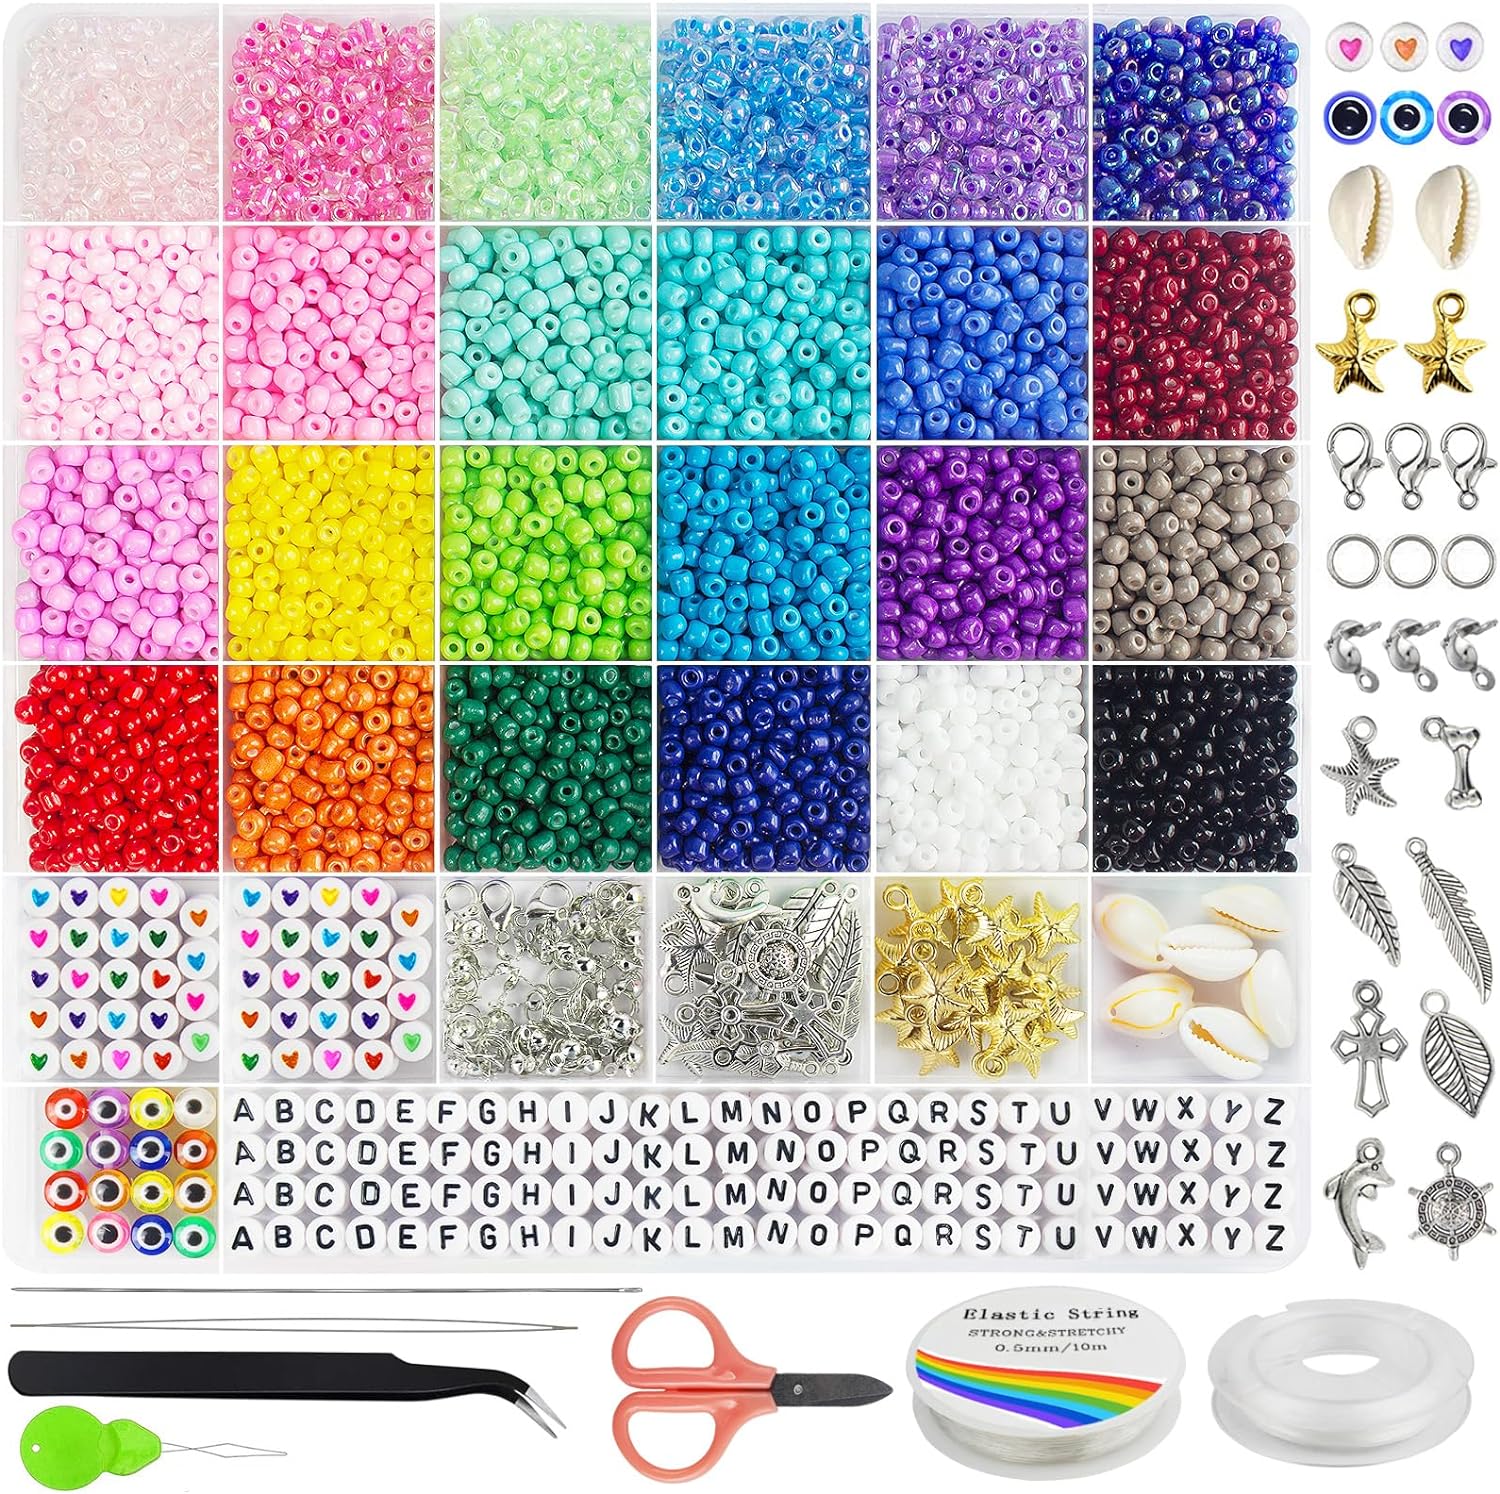
Redtwo 3400pcs Seed Beads – $6.99
Includes some fun charms, though mostly nautical. These are smaller beads.
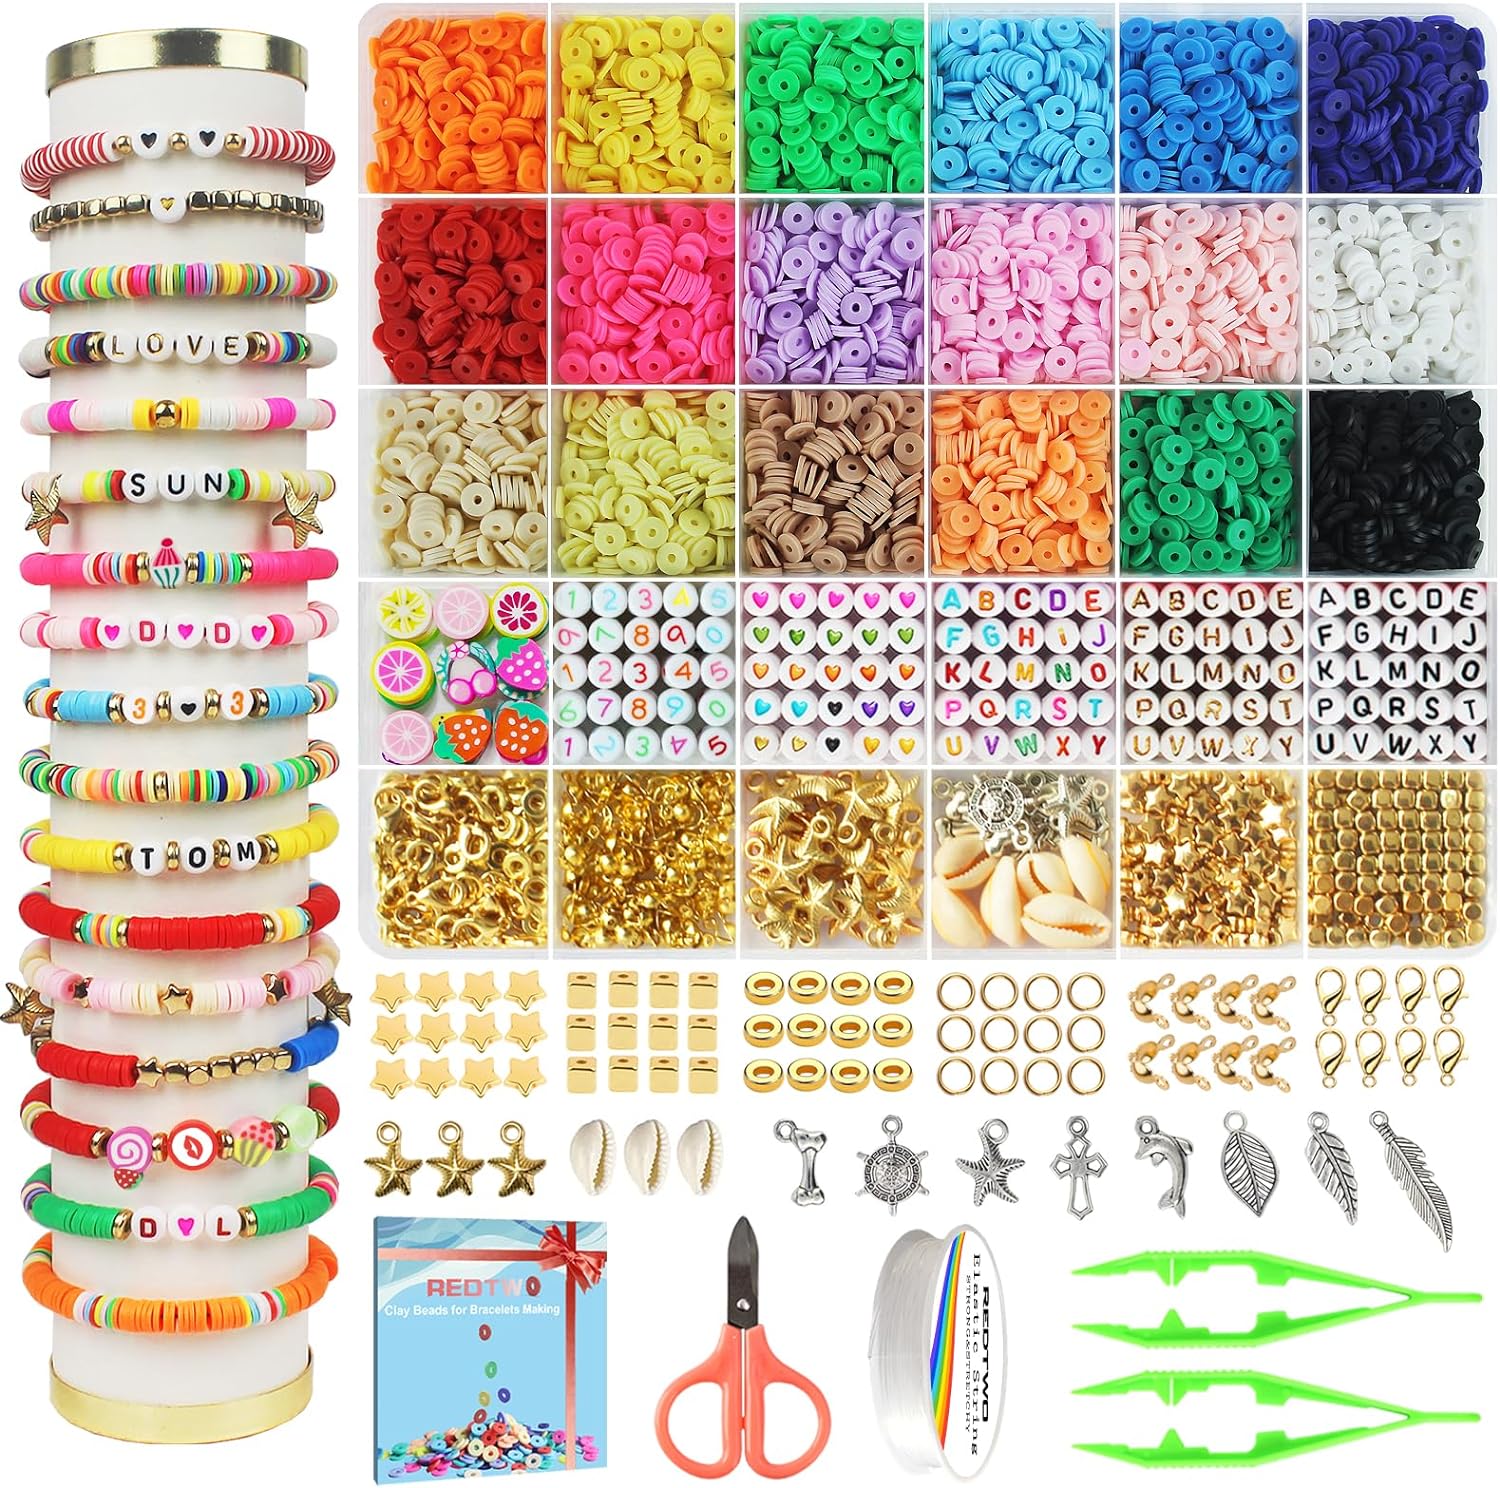
Redtwo 5100 Clay Beads – $5.99
Very thin beads with nautical charms
How to Make
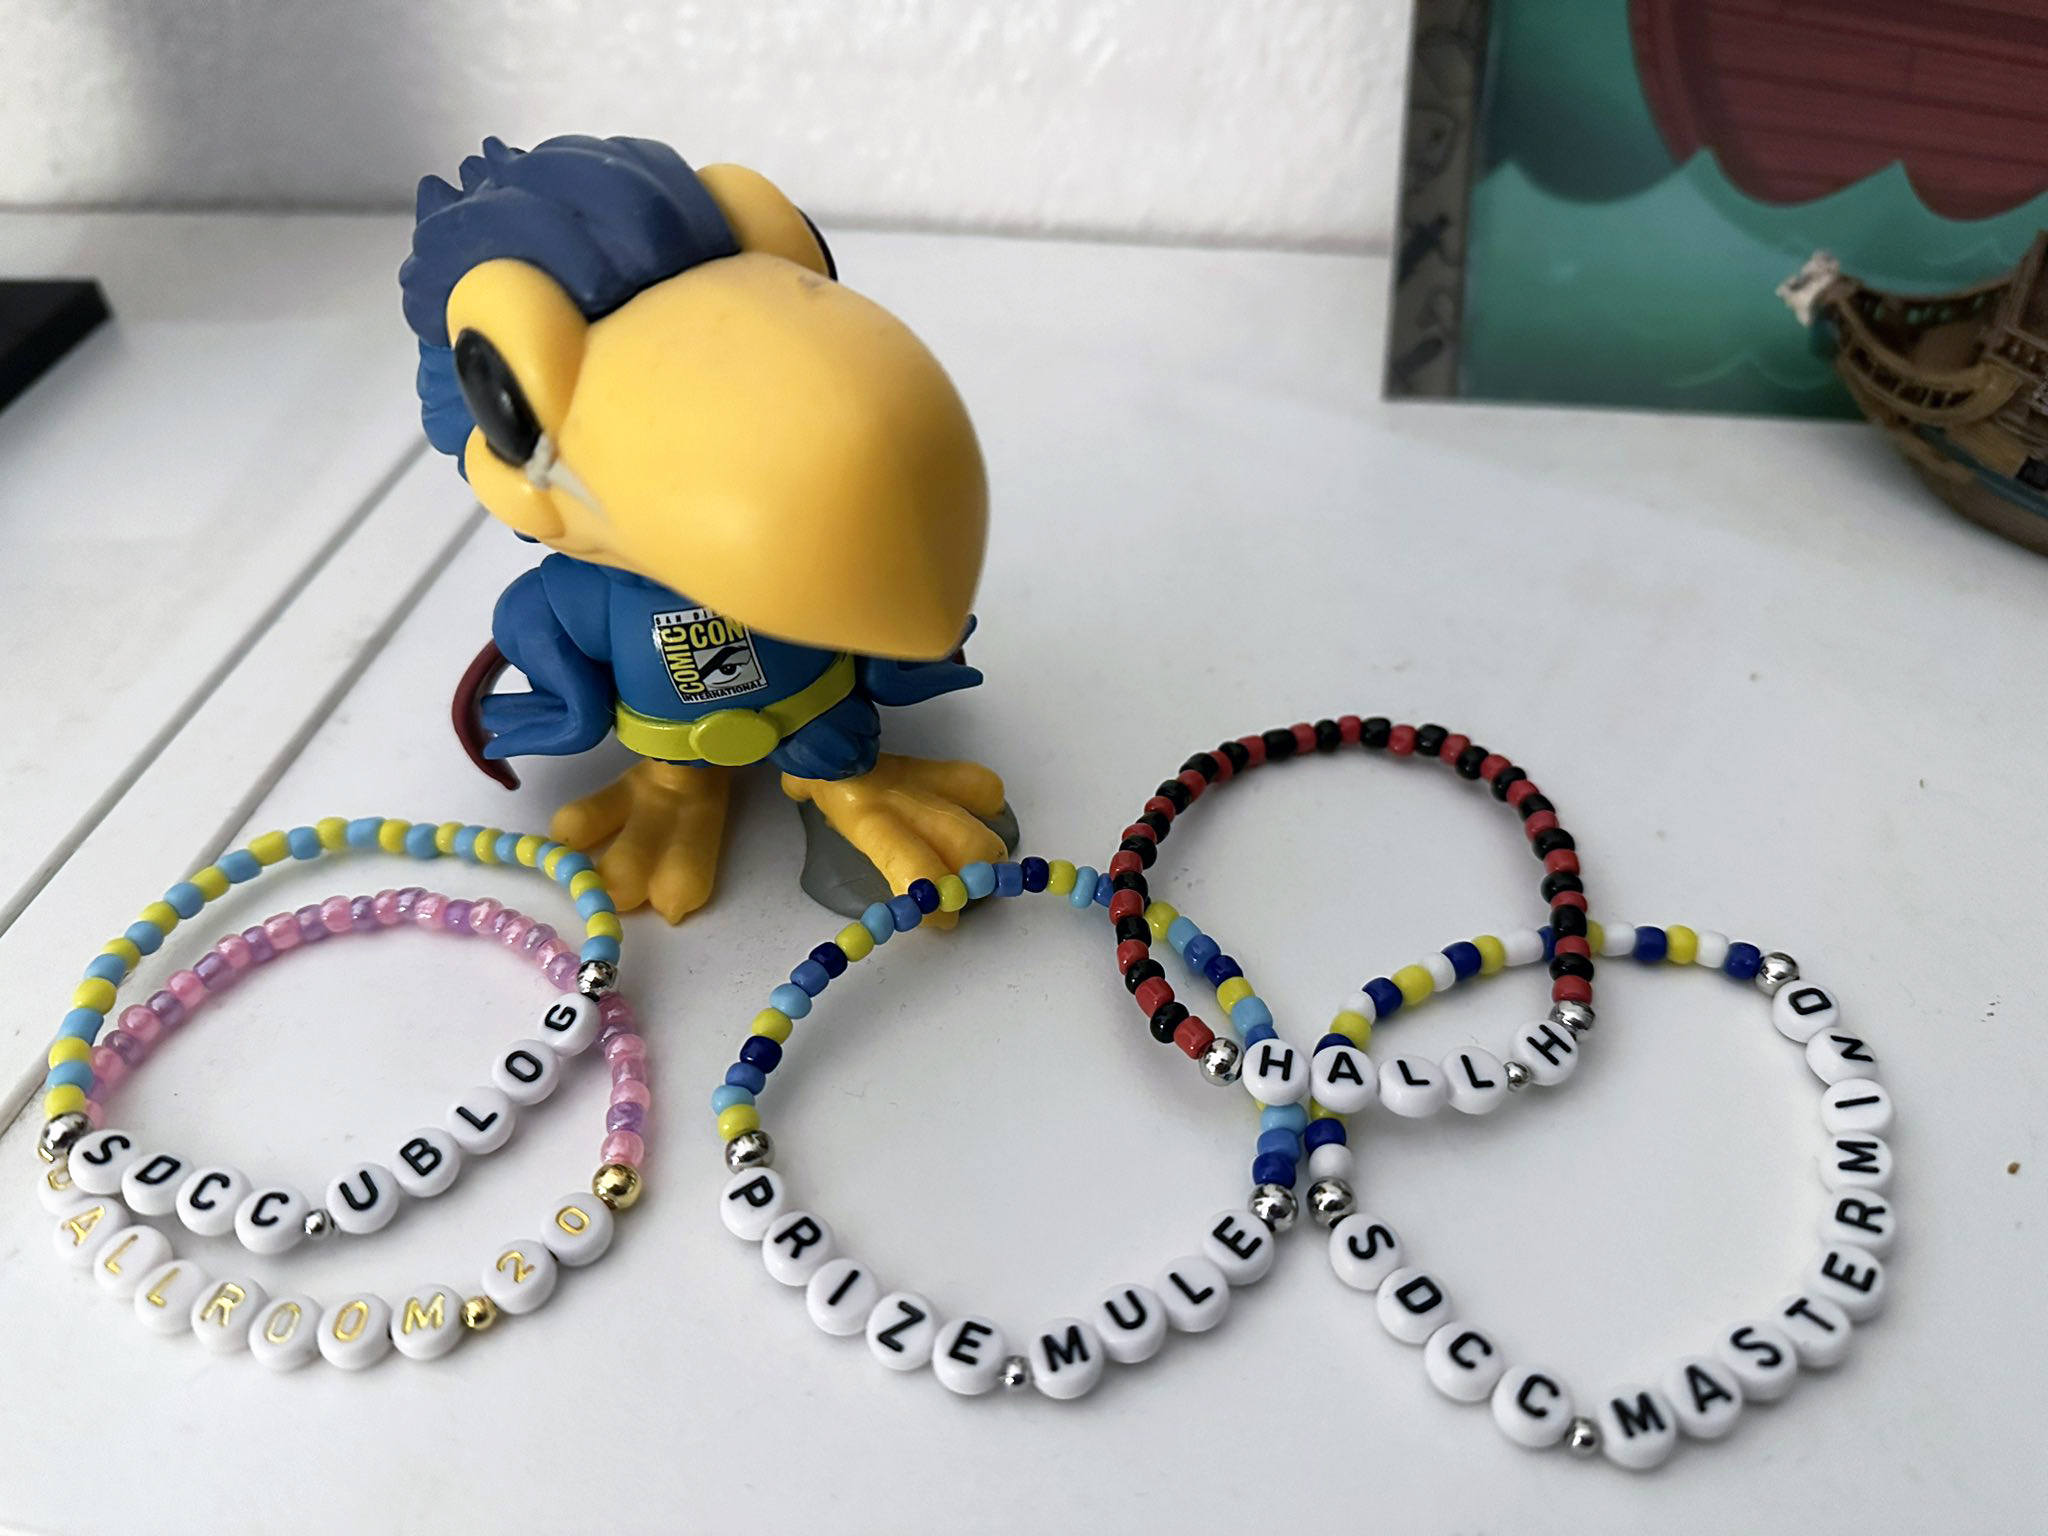
First, decide what you want the bracelet to say with your letter beads. For spaces between words, I would recommend putting a smaller bead between the two words. If you don’t have any ideas for words/phrases, here are a few suggestions:
- SDCC 2024
- HALL H
- BALLROOM 20
- WOLVERINE
- DEADPOOL
- BATMAN
You get the idea. The only rule is that there are no rules!
Next, decide on your colors. Ideally you want a cohesive look — so picking two to three colors that you alternate can be a good idea. Here are some cute bracelets from one of our readers, Alicia:
Some of the friendship bracelets I've made so far for SDCC! If you have any suggestions for short con-related phrases, let me know! I also have some "front of line" and "back of line" bracelets 🥰#sdcc #sdcc2024 pic.twitter.com/hhfBW2jy7O
— Alicia (@aliciasrealm) June 19, 2024
Next, cut your elastic string. I recommend cutting around 12″-15″ long, so you have plenty of cord to work with. Now, start stringing your beads or letters onto the bracelet! I typically start with my letters, to ensure I have enough space for them.
You can eyeball it, but typically 28-35 “big” pony beads is an adult sized bracelet. Or alternatively you can measure 7.5″ (but again, you want more space to start with so you can trim later). To check the fit, you can hold the bracelet to your wrist, careful not to send the beads flying everywhere (that part is very important, speaking from experience).
Next, you’re going want to pre-stretch your elastic, which means just holding both ends and giving them both a good tug.
Here is a good tutorial on how to tie the knot — but any Square Knot, Granny Knot, Surgeon Knot, etc. should work:
Finally, trim up the ends of your bracelets, but don’t trim them too short. You can also dab a bit of glue onto it for extra hold, but this is optional.
And that’s it! You’ve made a friendship bracelet!
How to Give Away
Our hope is that at the con, if you are wearing several friendship bracelets, someone might go up to you and ask, “Are you trading friendship bracelets?” and then you can each trade a bracelet with the other.
Alternatively, it may make sense to write “I have Friendship Bracelets!” on something and tuck it into your badge holder, where others can see. We will also be making buttons to give to those we see with friendship bracelets.