 It’s the most wonderful time of the year — and we don’t mean Christmas or Thanksgiving.
San Diego Comic-Con Open Registration for 2024 is set for Saturday, November 18 at 9AM PT – which means that for better or worse, you’ll know soon whether you’re attending the pop culture juggernaut next year.
We don’t want to scare you, but the odds of purchasing a badge in Open Registration are a lot harder than in Returning Registration, simply because the pool of people wanting to score a badge is exponentially larger. But thousands and thousands of attendees manage every single year, and we’d like each and every one of you to go into the sale as prepared as you can be, to walk away with the golden ticket.
So: Are you ready?
Just in case you’re not, we’ve put together a guide and tips on making sure you are ready for the November 18 sale.
You can also join us, whether you’re buying a badge or just wanting to hang out, at the SDConCast’s Open Registration Live Coverage podcast. We’ll be kicking things off at 8:30AM PT, 30 minutes after the waiting room officially opens and 30 minutes before the sale kicks off, and we’ll be updating on any issues we see users having, badge inventory, and more. Plus, it’s a great way to celebrate getting a badge. Or great background noise as you crack open a bottle of wine to drown your sorrows.
What You Need
Above all else, you need to actually be eligible for Open Registration for 2024 (rocket science, right?). This is actually much easier than Returning Registration (the first round of badge sales, for those eligible attendees who attended in 2023 as a general attendee). Instead, all you need to be eligible for Open Registration is a Member ID (and unlike in previous years you can still make one right up until the sale actually starts!). Easy, right?
Unlike Returning Registration, there is no “Eligibility Checkmark” to look for on you Member ID page.
Once you’ve verified that you’re eligible, you’ll need to gather a few things:
- Credit card information
- How many badges you are buying (you can buy for up to 3 individuals total, which can include yourself but cannot exceed three total) and what days each person wants
- Login information for your Member ID (Member ID and password)
- The last name and Member ID of anyone you are buying a badge for (each person must be eligible for Open Registration on their own)
IMPORTANT! SO IMPORTANT! NEW AS OF LAST YEAR, last names are now combined with suffixes. If your name appears in your Member ID as “Jane Doe-Greene, Jr.” then your “last name” would be “Doe-Greene, Jr.”. Any other combination or spelling of that, down to the comma, would result in a “User not found” when trying to find you to actually purchase badges. If in a badge buying group, we STRONGLY recommend taking a screenshot of the way your name appears in your Member ID and sending that to anyone in your badge buying group.
Price
Be familiar with the cost of a badge. Single day badges will run $79 each for a Thursday, Friday, and/or Saturday badge, with $54 for a Sunday badge or $59 for a Wednesday Preview Night badge (only available if you’ve purchased all four days). A combined four-day badge with Preview Night will run you $350. Additionally, there is a $15 handling fee per person you are purchasing for.
Here’s the breakdown of prices:
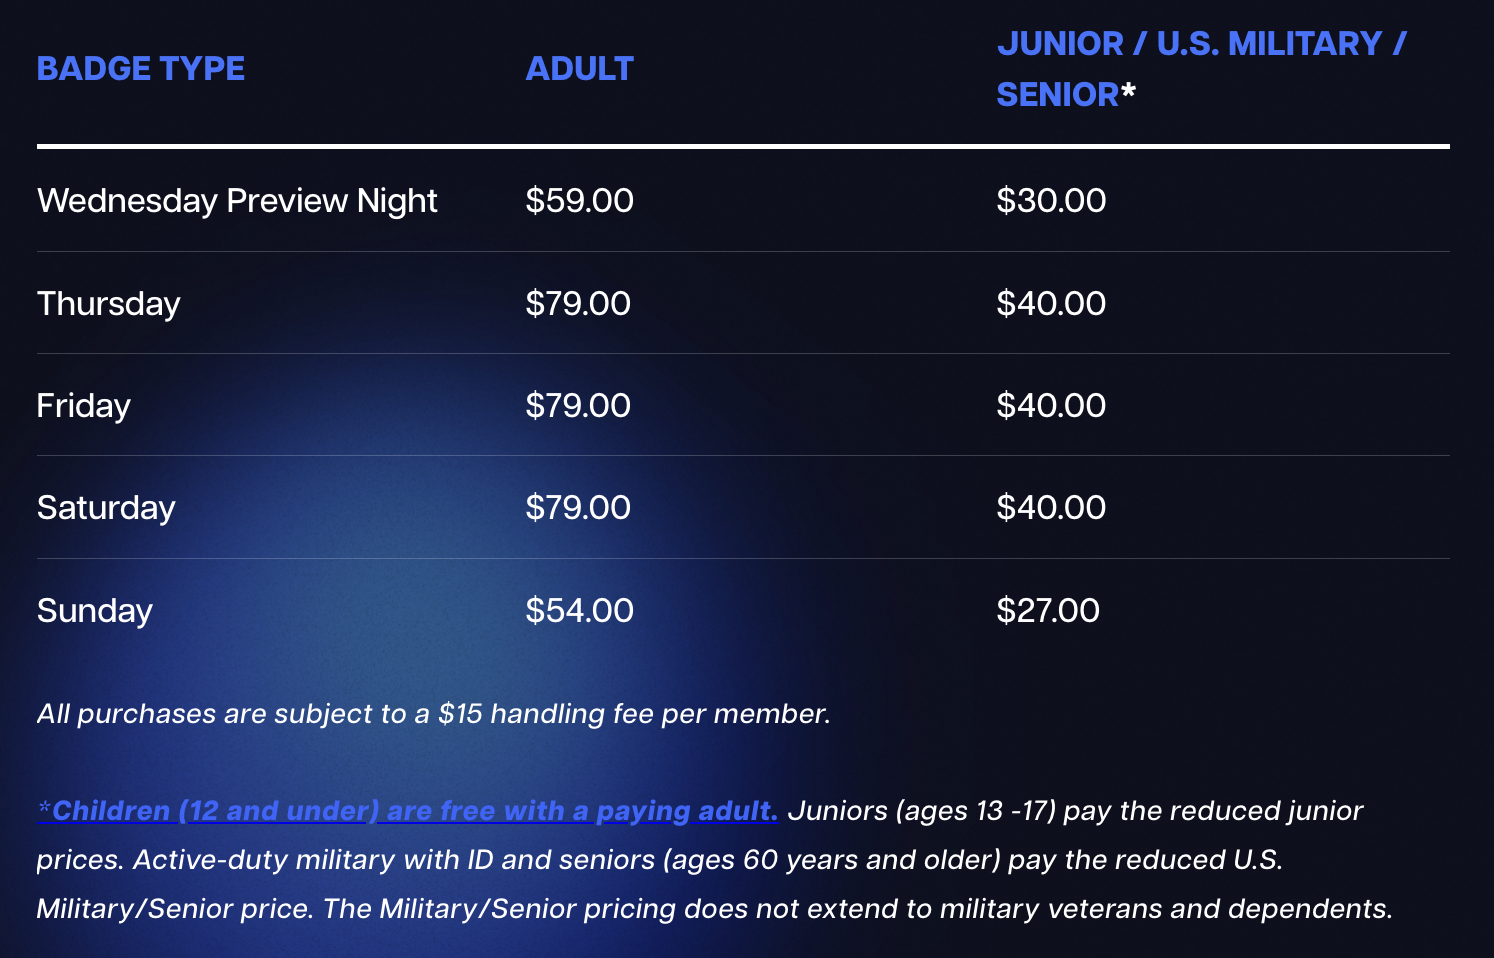
We’ll discuss how to potentially split up payments further down, but a note: You may not be comfortable “spotting” someone upwards of $365. Again, we recommend only forming groups with people that you feel comfortable being in a financial situation with. If you’re not comfortable, don’t share payment information.
Badges will be mailed to the “Primary Shipping” address in your Member ID. If you’re an international attendee, you can either enter the US domestic address of a friend, or choose to pick up your badge on-site. You have until May 13, 2024 to log into your Member ID and ensure that the address is correct.
The Process
On the morning of the sale, between 8AM-9AM PT, you will go to the Member ID portal. From here, you will be redirected to a QueueIt waiting room, which will count down to the actual start of the sale, which will kick off at 9AM PT. The waiting room looks something like this:
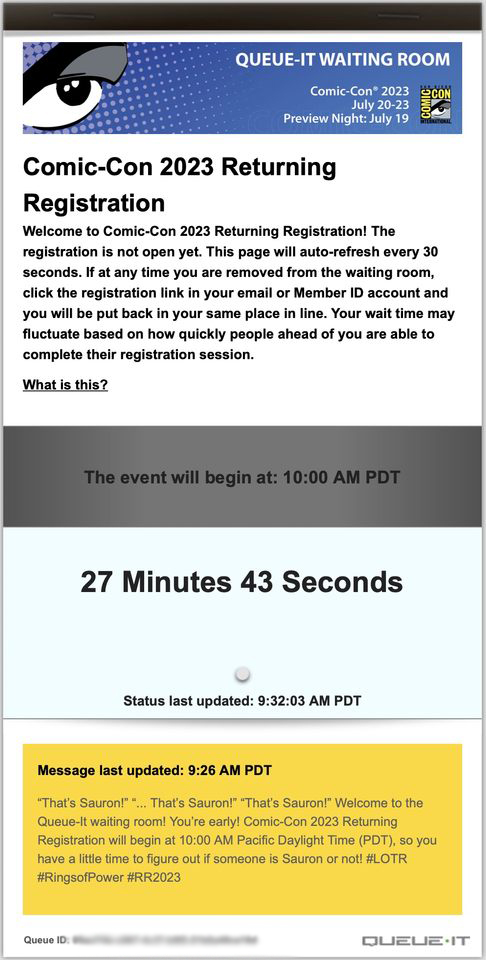
If there are multiple members of your family trying on a single device, remember to have each person login on a separate browser.
Yellow status bars, like the one above, will continue to appear and give updates throughout the sale.
Beginning just after 9am, QueueIt will randomize everyone in the waiting room. It’s a quick process, and truly random — and those who arrived at 8AM on the dot have as much chance of getting a “good” spot in line as those who entered at 8:59AM. There is no advantage to arriving early. However, there is a disadvantage to arriving late, as those who try to enter after 9AM will be placed at the back of the line. For this reason, it might be good to arrive a little early, to test that everything is working properly prior to 9AM.
Once the sale kicks off and everyone has been randomized (this process typically takes less than a minute), you will have a “walking man” and a green status bar to roughly approximate how close the walking man is to being able to purchase — along with an estimated wait time. For some, this may be only a few minutes. For others, it may be “more than an hour”. But fear not! It took 96 minutes for Returning Registration to sell out, so even those with “more than an hour” could very well secure badges.
IMPORTANT! SO IMPORTANT! Do not, under any circumstances, share your link once you are in the waiting room (or after you have made it through to purchase). This includes sharing screen shots if your waiting room with your Queue-It ID at the bottom. This link is yours and yours alone and CCI will be monitoring the link in order to detect fraud. Link sharing was likely one of the main reasons that multiple badges purchased during Open Registration were subsequently canceled.
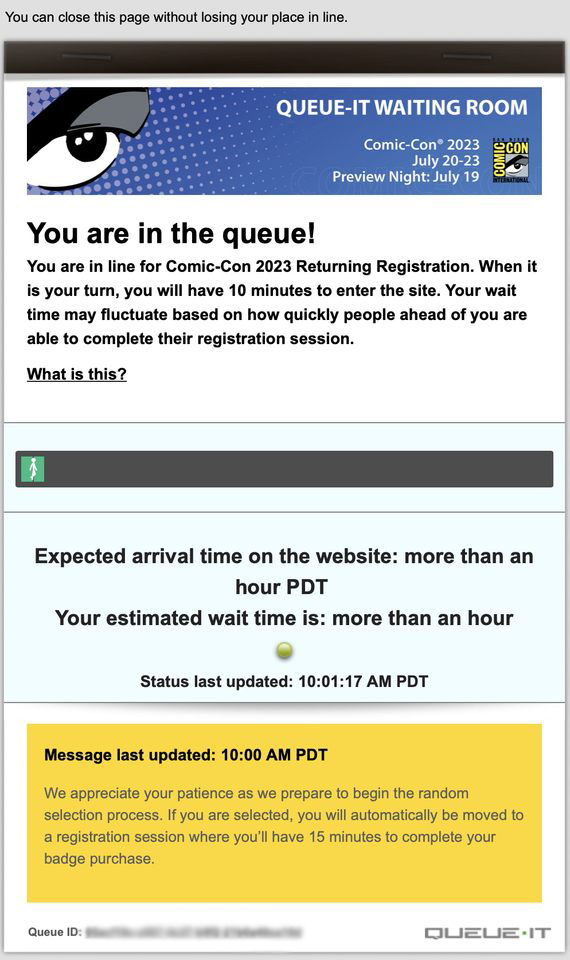
If you are accidentally removed from the waiting room or lose connectivity, simply click to return to your Member ID and you’ll be redirected to the QueueIt waiting room. You will be put back with the same group you were previously.
When it is your turn to purchase a badge, you will either be asked to login, or you may see this page:
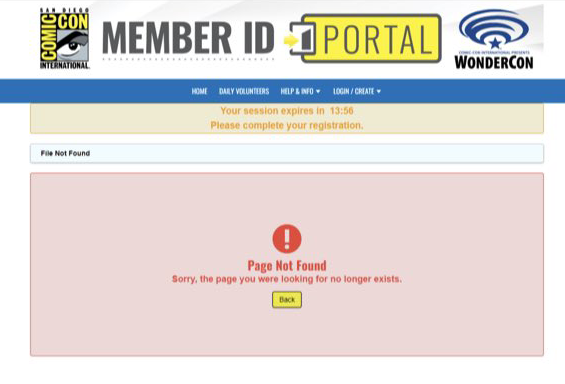
If you do, simply click the Login/Create button, then select Login, and from here you can login.
Once logged in, you should be taken directly to the buying page. It is here that you can choose who to purchase for. If you wish to purchase for yourself, it will come up automatically under the Registrants tab with your information, and you can select Thursday, Friday, Saturday, and/or Sunday badges, as inventory allows. Once you have made your daily selections, click Add to Cart.
Wish to register someone who isn’t you? Click the Register Another Member ID tab.
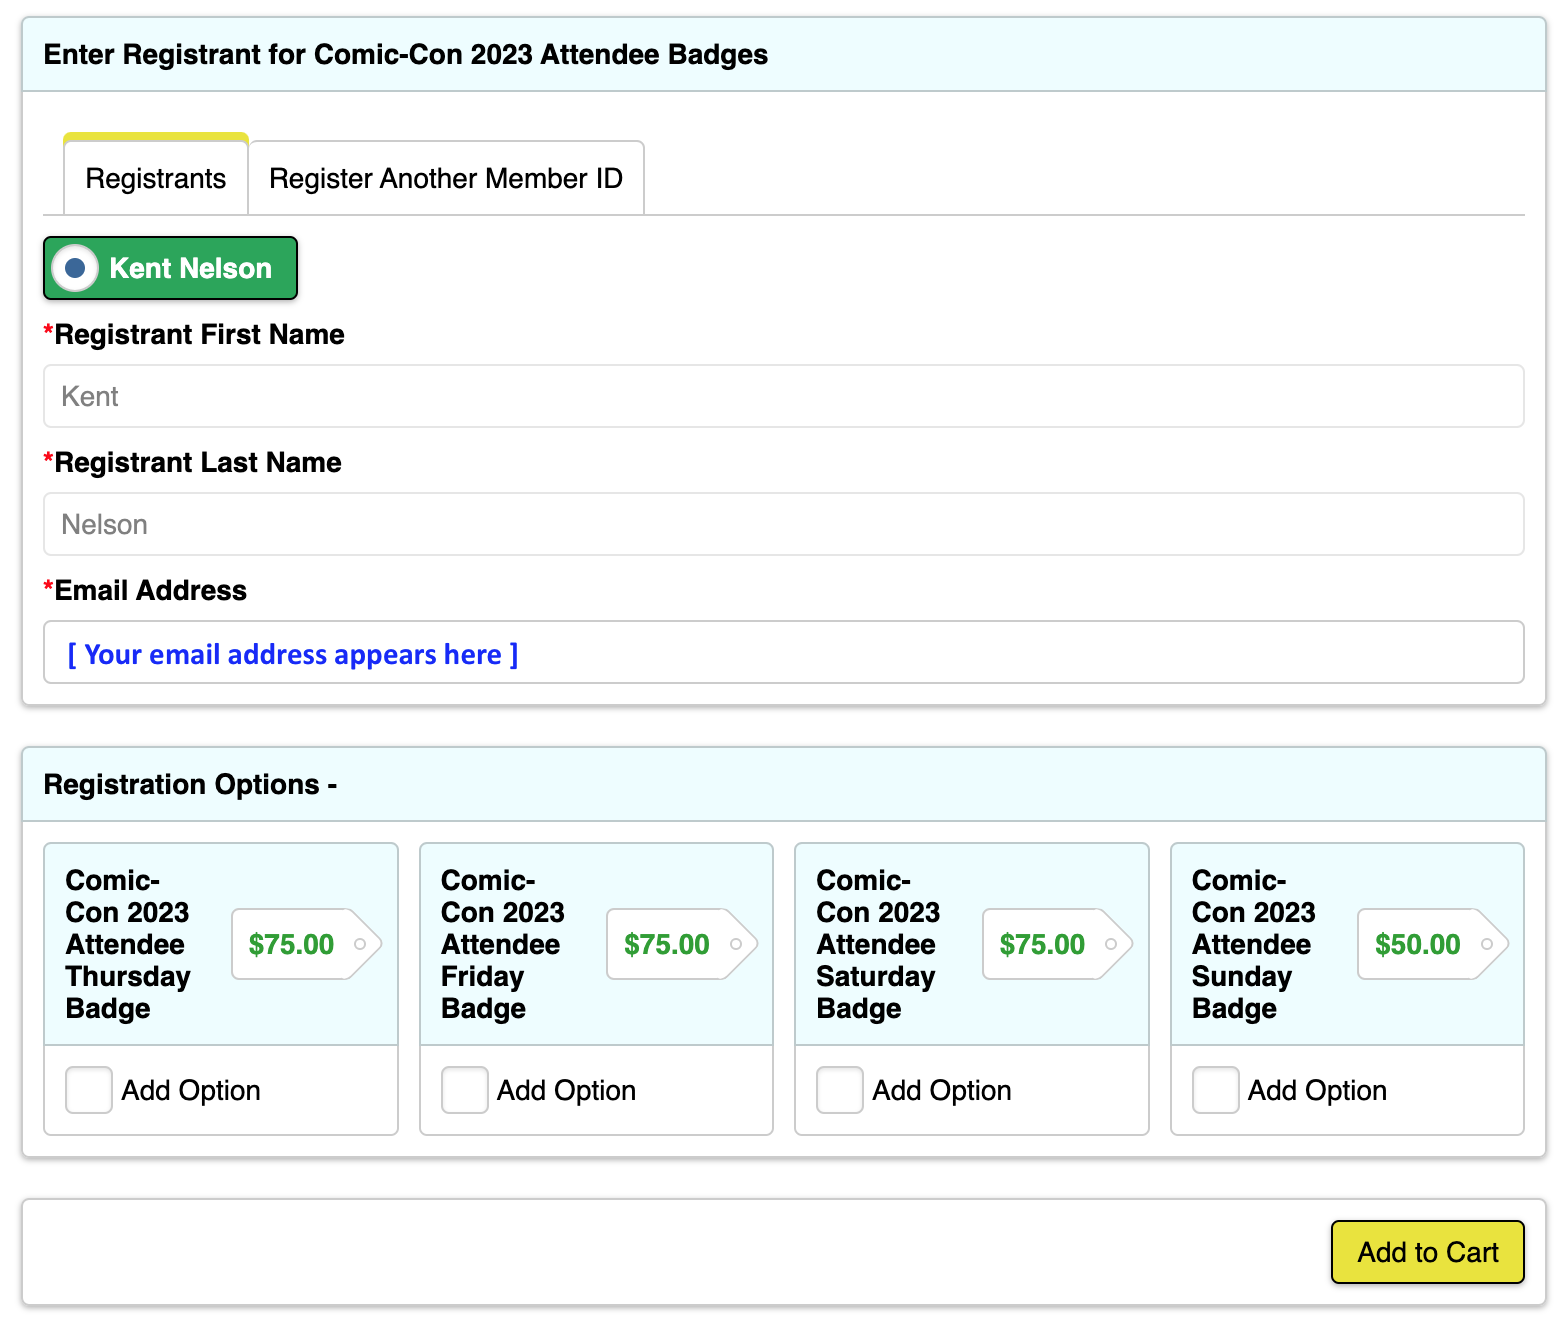
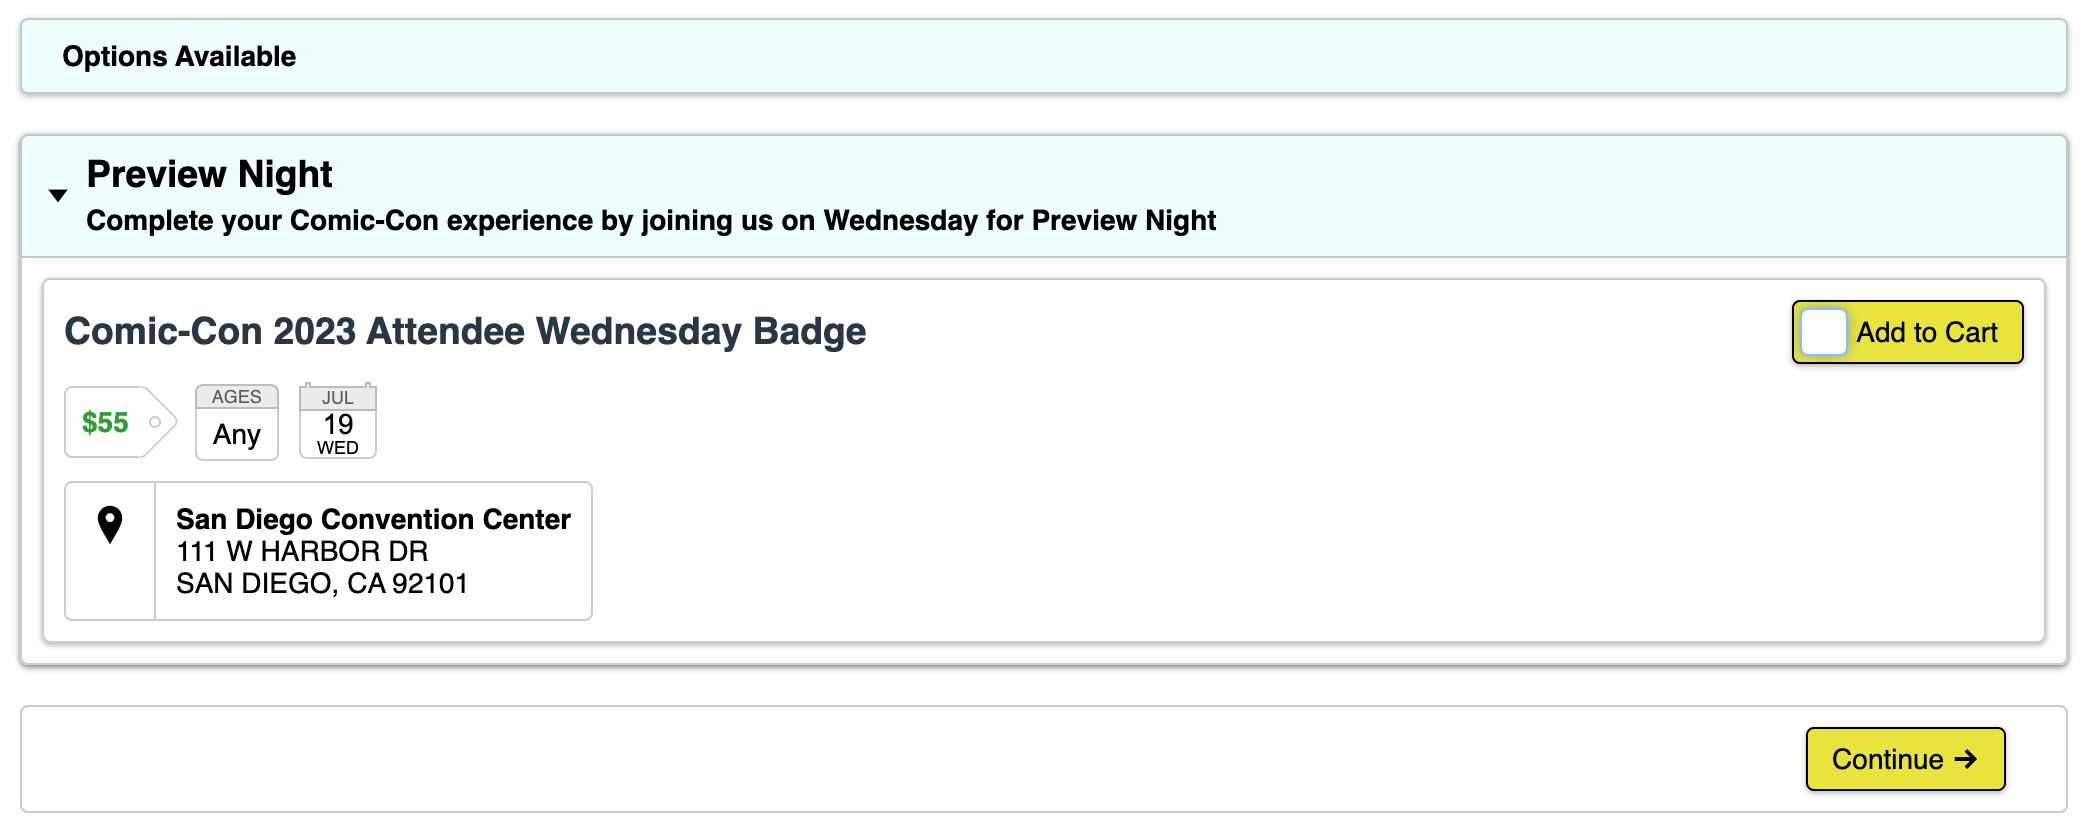
If you add all four daily badges (Thursday, Friday, Saturday, and Sunday) to your cart, you will be taken to a second page which will give you the option to also purchase Purchase Night, depending on inventory availability. If you wish to add it and it’s available, click Add to Cart and then Continue.
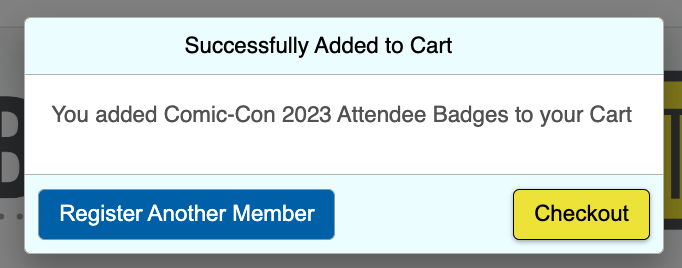
Once you’ve added one set of badges, you’ll see a pop-up window that you’ve successfully added to your cart. If you’ve registered everyone you want to register, choose Checkout. If you wish to add additional people (again, you can register for up to three including yourself), click Register Another Member.
If you choose to register another member, you’ll be taken back to this screen, and will need to select the Register Another Member ID tab. Enter the Member ID and last name of the person you are looking for and click Search, and it should pull them up.
If you get “User Not Found”, this is likely because you have mistyped their Member ID, or their last name isn’t appearing correctly. Remember, Last Names must appear exactly as they do in the Member ID, including suffixes and commas. Once the sale starts, no one can login to their Member ID as normal to double check, so it’s incredibly important to make sure you’ve written down your last name exactly as it appears ahead of time.
Check the boxes to add each day that person wants as before, and click Add to Cart.
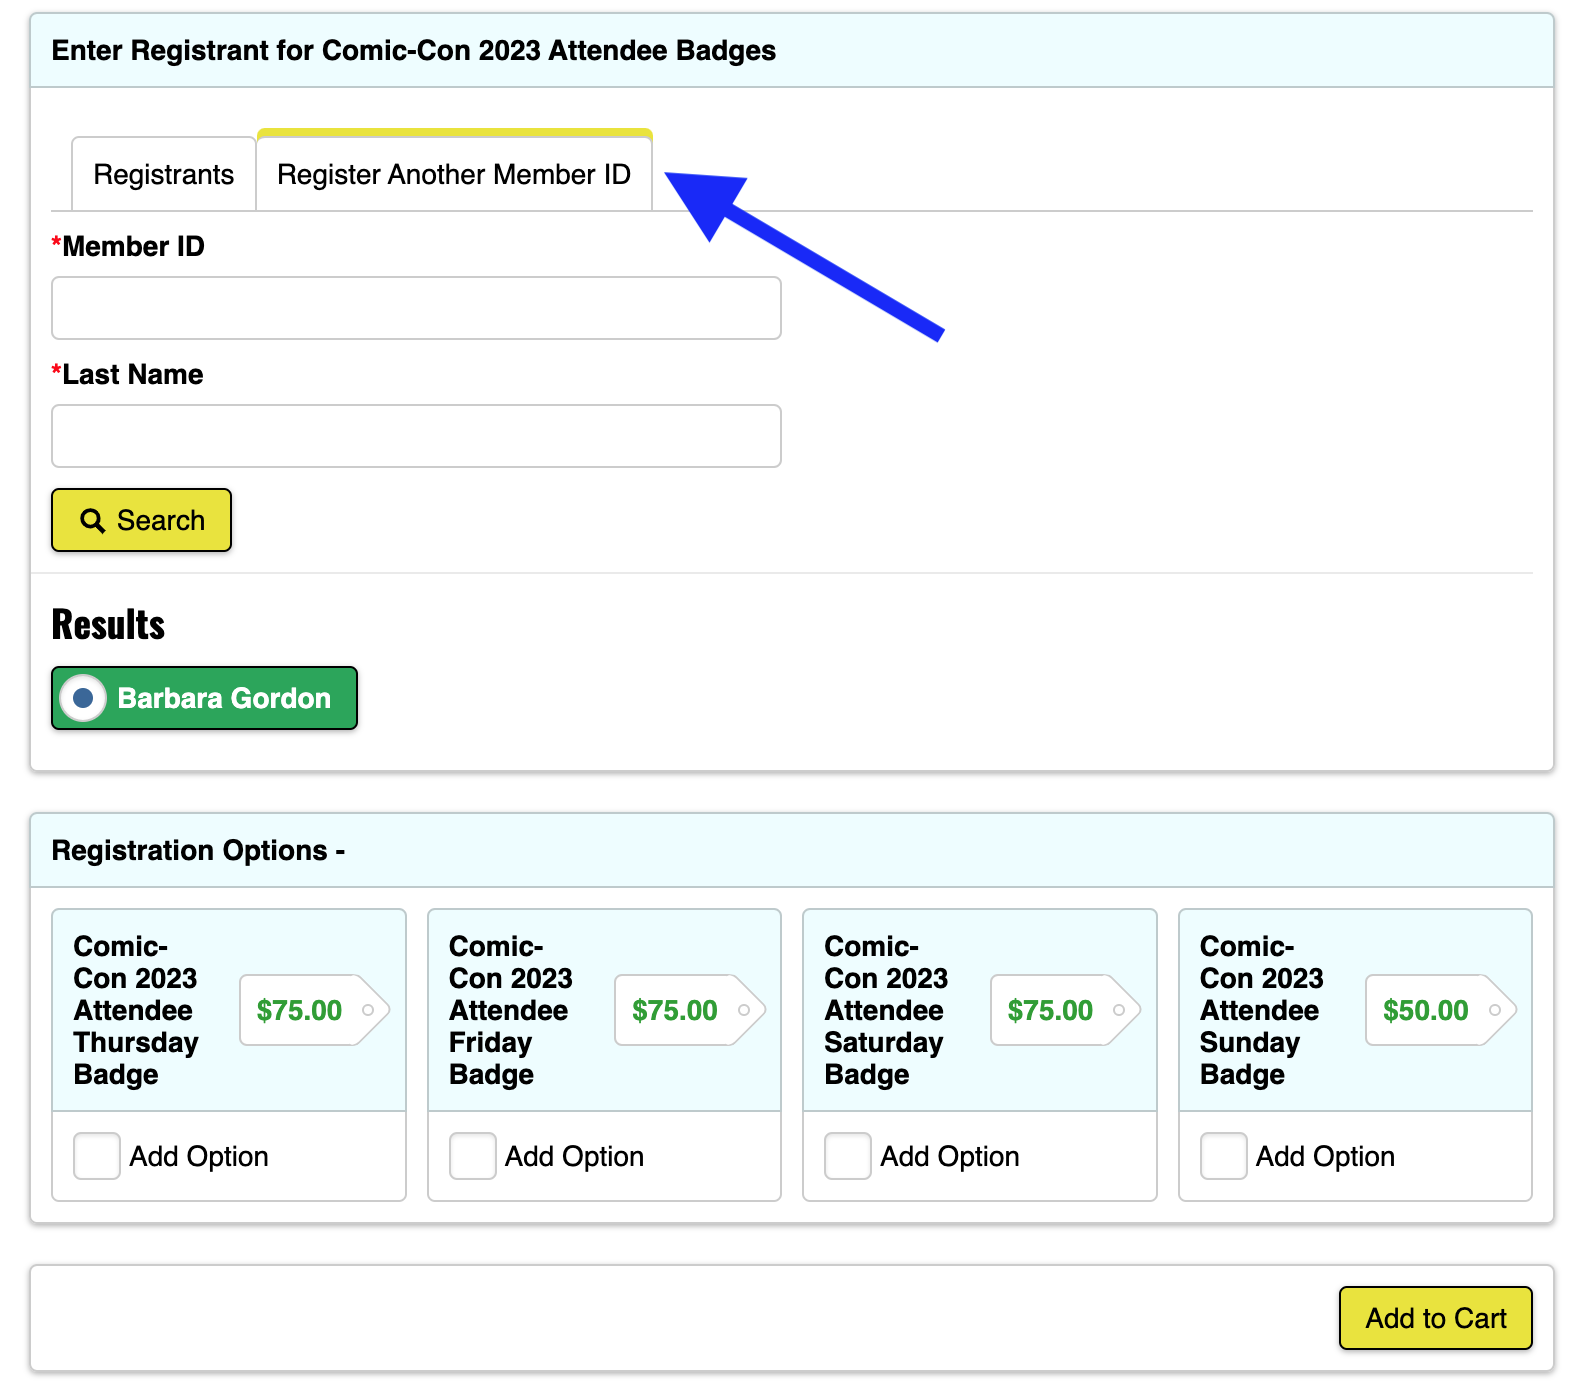
If you get the message that “Product requires membership access unavailable to participant”, this is likely because 1. the person already has all available badge days 2. the person is not eligible for this sale.

After you’ve added everyone you wish to register (up to three people, which can include yourself or can be three other people) , you’ll click to Checkout. From here, you’ll be taken to enter your payment information.
IMPORTANT! If at any point it tells you that a badge day has sold out and won’t let you continue to checkout, click the red X beside the badge day that has sold out on the recap in the sidebar to remove it from your cart. It should let you proceed as normal from there.
NOTE ABOUT PREVIEW NIGHT! If you participated in Returning Registration and were able to secure every day excep Preview Night, you’ll have a slightly different process. When selected to purchase badges, you’ll:
- Click “Buy Preview Night” from the top menu bar.
- On the next page, click the “Yes, I’m eligible for Preview Night!” button. Your account information will be pre-populated under the “Registrants” tab on the next page.
- If you wish to purchase a Preview Night badge for yourself, click “Add to Cart”.
- If you’d like to purchase badges for others, click “Register Another Member” in the pop-up window. Or, if you’re ready to check out, click “Checkout”.
This method is ONLY for if you, or the people you are purchasing for, just need Preview Night badges. If you need badges for any other days, you are instructed to remain on the main registration page.
Once you have selected all badge days you wish to add for up to three Member IDs, enter your credit card information (CCI accepts Visa, Mastercard, or American Express) and billing address, then click “Save”. If you already have a credit card saved to your account, click Save & Continue.
On the next page, you will see a recap of your purchase, and an option to Process Order on the right hand side.
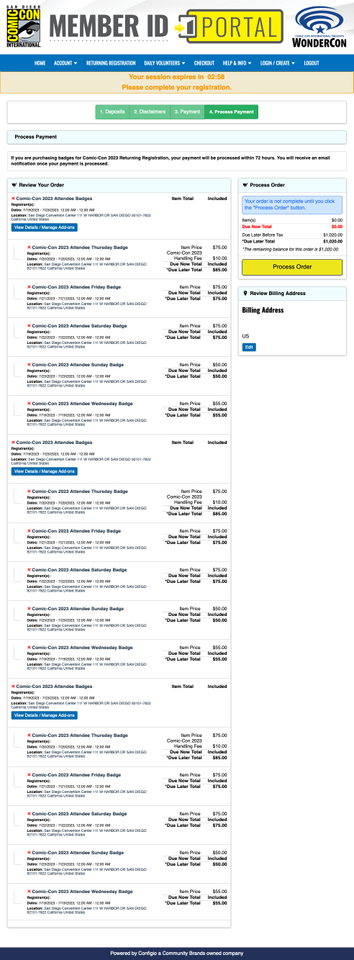
Click Process Order and you’re done!
The Member ID of the purchaser should receive a recap e-mail, and badge confirmation e-mails with barcodes will be sent “at a later date”.
Payment
Comic-Con International only accepts payment via Mastercard, VISA, and American Express.
You have two options for paying for your badges:
Option #1 – Do nothing, and the person who submitted the order will be charged for any/all badges they purchased. This is perfectly fine! You’re not required to do Option #2!
Option #2 – If someone else purchased your badge for you, you have the option to pay for it yourself if you’re quick. Once the sale is over and the Member ID portal has opened back up normally, you can login and go to your “Account Dashboard”, then click “My Notifications” on the left hand side. From here, you’ll see the Balance for your individual badge and “Pay” button. You will only see this if CCI has not yet hit the card of the original purchaser. Last year, this took several dates — but for Returning Registration, it only took a few hours, so if you’re planning to go this route, do it immediately following the sale.

This will take you to a new screen. Fill out the totals in the Amount column (note: One will likely seem higher than it should because it will have the $15 service fee). Click Add Payment beside each one. Then click Checkout and continue checking out as normal.
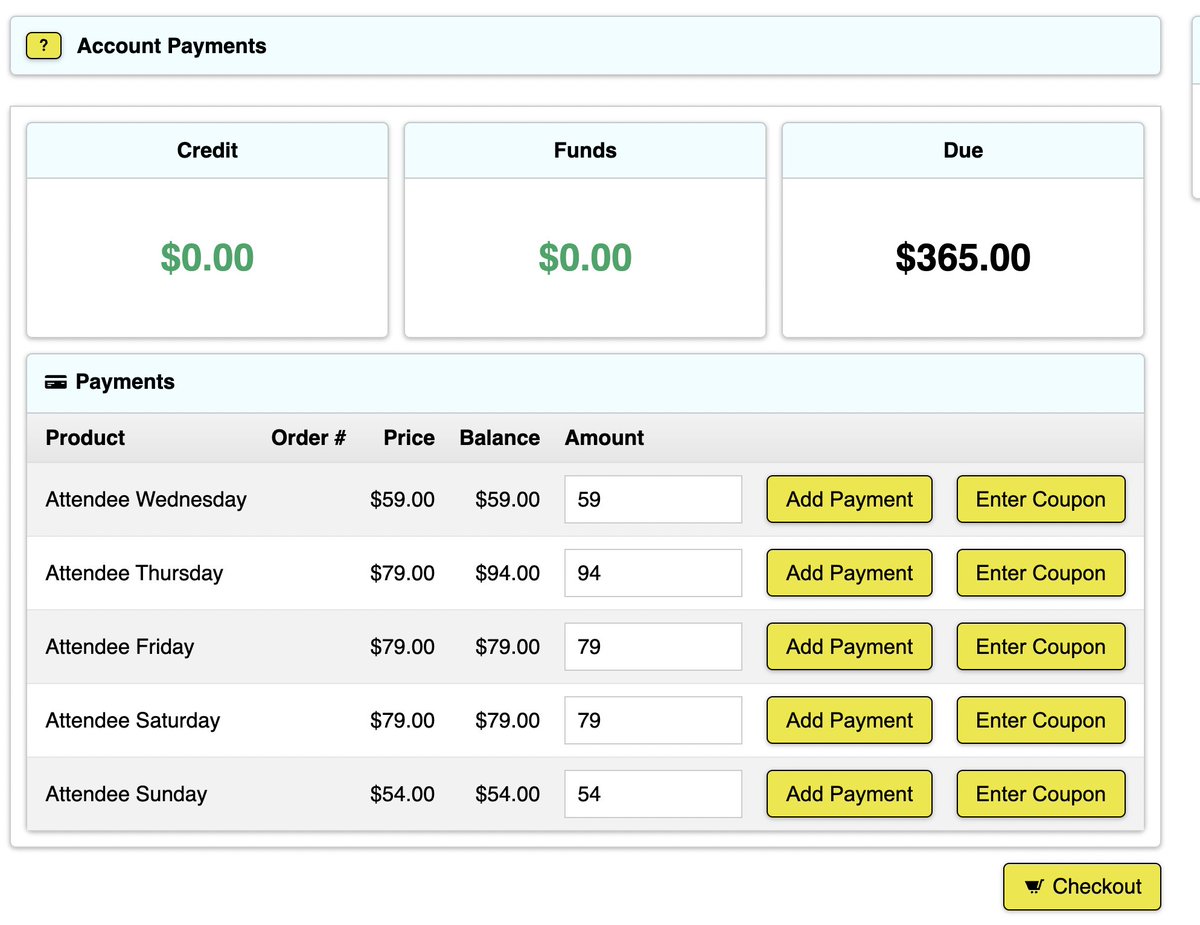
NOTE: Again, you are by no means required to do Option #2, and if you do, we’d recommend doing it quickly. We’ve heard from some users who claim they got double charged, though it’s impossible to know if this was due to user error or confusion. However, if concerned, just do nothing and pay back the original purchaser, as per usual. The main benefit to Option #2 is that one person is not responsible for being hit with hundreds of dollars at once for everyone’s badge.
The Technical Side
This is a new system than in previous years, though the same as Returning Registration. The only steps you can take to try to avoid these issues are to make sure you’re following the technical advice provided by Comic-Con International.
Here is a quick overview:
The following browsers have been tested:
- Firefox: Latest version
- Google Chrome: Latest version
- Internet Explorer: Version 11 only
- Safari: Latest version
- Microsoft EDGE: Latest version
Additionally, while some have reported success using mobile devices and tablets, Comic-Con International does not recommend this.
Tips
- Although the randomized waiting room theoretically “evened the playing field” for all attendees at having the same chance at scoring a badge, there is still at least one tactic that might give you an advantage: Buddying up. Work with friends, as well as the Comic-Con community at large. We recommend the Facebook groups San Diego Comic-Con (SDCC) Attendees and SAN DIEGO COMIC-CON.
- Theoretically, the larger the circle of people you are working with to try to score badges, the better chance you have at getting one. After all, if you’re working with nine people, there is a better chance at three of those people will be placed in a “good” spot in line and be able to purchase badges for all nine team members, than there is a chance that on their own, all nine individuals will be given a “good” spot in line. The larger the group, the better the odds.
- Only work with people that you trust and feel comfortable sharing money with, and who you trust to pay you back for their badge.
- Also be aware of all the new(ish) changes — particularly in relation to last names/suffixes (screenshot your name and share that!), and how to remove badge days if they sell out while in your cart. Children under 12 who receive a free badge will register on-site still. Verify your mailing address in your Member ID is correct no later than May 13, 2024.
It’s also important to be prepared prior to the sale. We’d like to think you’re all up to speed already — you are now.
Will you be trying to buy a badge in Open Registration? Let us know in the comments.

